Table of Contents
I have a number of tasks that I need to do throughout the day, and occasionally those tasks get forgotten. If they aren't on my calendar, with at least 2 alerts, there is no guarantee that it will be completed.
Even something that is done every day at a specific time is often overlooked when that time comes and goes.
Every morning, each Support Technician has scheduled time at the beginning of our shift to go through yesterday's events and plan out today’s tasks in an effort to make sure we don’t feel behind all day. It’s a hugely important and beneficial part of our day and a sacred uninterruptible time that everyone at the company respects. Having dedicated time to:
- Close/snooze tickets that don’t need attention
- Evaluate repairs
- Respond to “quick hits” and easier tickets
- Plan out phone calls that will need to be made
- Respond to high priority tickets
- Help a teammate prepare for the day
This is wildly helpful for starting our day off correctly so we are able to better WOW our customers and provide the stellar service our customers are accustomed to.
After our prep time, the phones are open and we are fully available to incoming calls, slack/chat communications, emails, new tickets, part testing, walk-ins, and scheduled meetings.
So how do we jump back into the grind and when? For me, if I don’t have alarms, timers, calendar alerts, and even a visual queue then I don’t remember and my prep-time leaks into ‘team-time’, which is not acceptable. One extremely versatile tool I have been relying on lately is the Task Scheduler. Task Scheduler is an application built into Windows and is more useful than you might think.
Why you need this article
Microsoft Windows includes a number of tools to make life easier and more convenient, and there are some very simple steps you can take to learn how to automate tasks. Task Scheduler can run commands, execute scripts at pre-selected date/time and even start applications. You can even choose specific events that will trigger the task. Task Scheduler monitors the events happening on your system, and then executes selected actions when particular conditions are met.
This article will guide you on how to configure Task Scheduler. We will cover a basic task and in future articles will cover advanced tasks and how to edit existing tasks.
Create a Basic Task
1. Open the Start menu
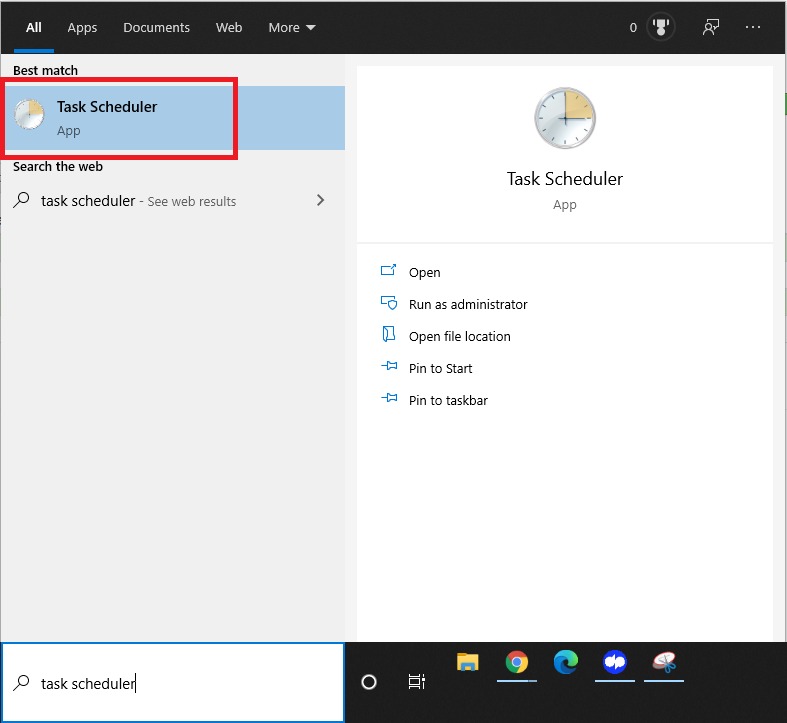
2. Type Task Scheduler then click the top result to open the tool
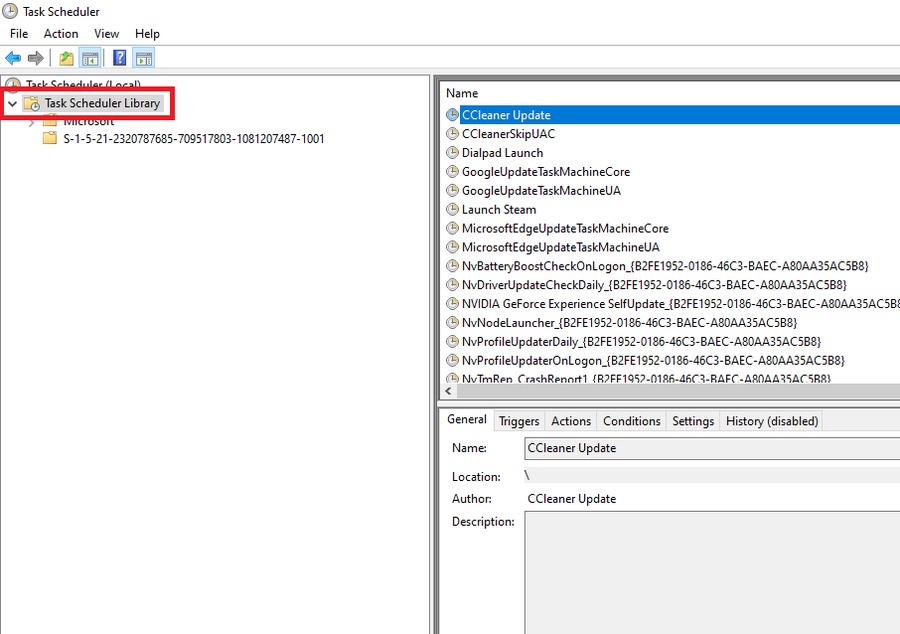
3. Go to the left-pane menu, then select Task Scheduler Library
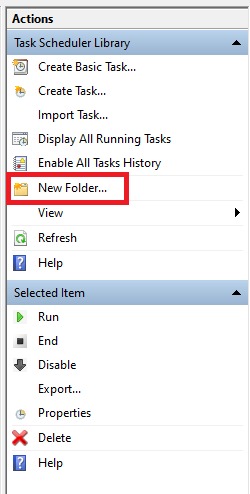
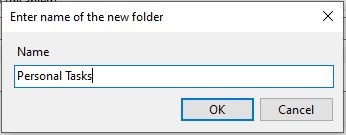
4. Now, you need to go to the right-pane menu or the Actions options. Click New Folder.
Choose a friendly name for the folder you are creating. Choose something that will easily differentiate it from the system and application tasks already scheduled.
5. Click OK
Back in the left-pane menu, expand the contents of Task Scheduler Library
Select Personal Tasks (or the new folder you created)
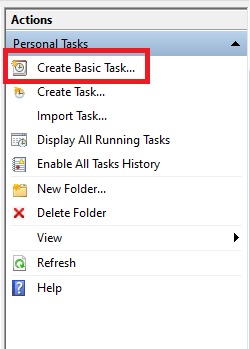
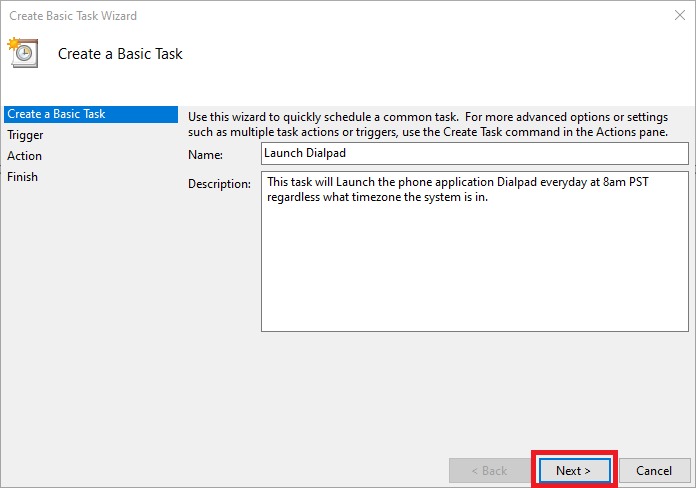
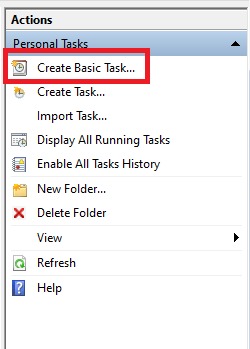
6. Navigate to the right-pane menu, click Create Basic Task
7. Input a short description inside the Name field, describing the nature of the task – for instance, Dialpad Launcher
8. Click Next
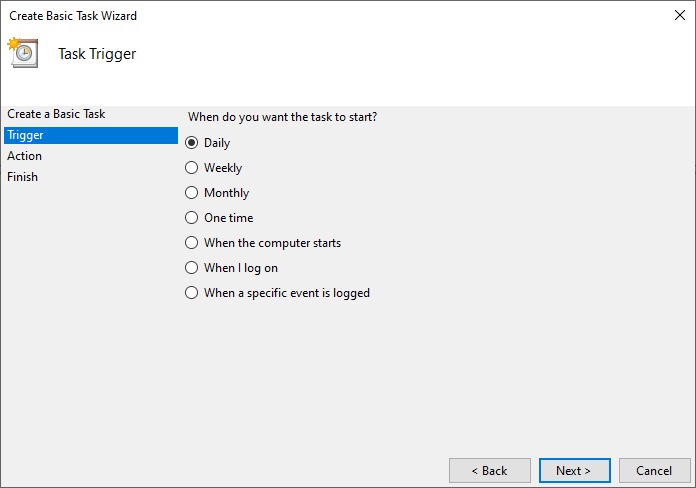
9. Select a trigger for the task. Keep in mind that Task Scheduler lets you choose from various triggers, including the following:
- Daily
- Weekly
- Monthly
- One time
- When the computer starts
- When I log on
- When a specific event is logged
10. Click Next
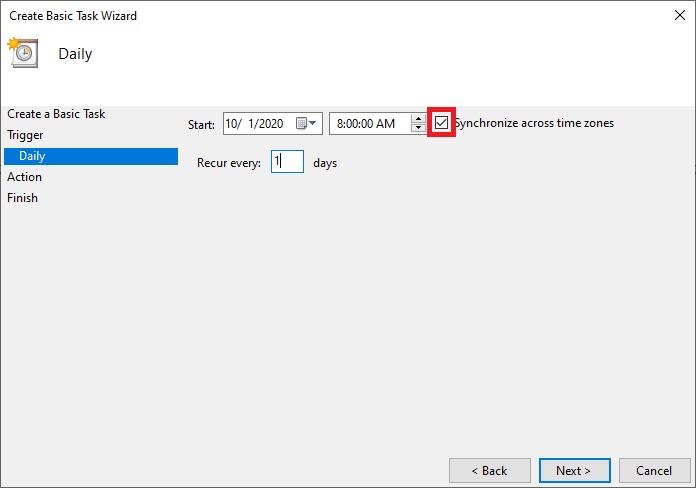
11. On the next page, decide when you want the task to run. Click the calendar list beside the Start option to select the day. If you chose ‘Daily’ as the trigger option, you can also opt for the task to recur for every specified number of days. Selecting the 'Sync across time zones' allows the system to run the task regardless of location
12. Select the Time you want this task to trigger
13. Click Next
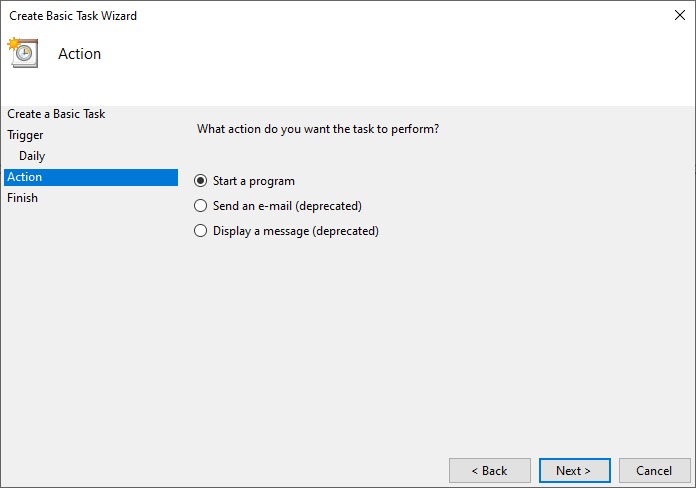
14. Once you get to the Action page, choose the Start a program option to execute a script, launch an app, or run a command. You have the option to select Display a message or Send an e-mail. However, do note that these are deprecated features. Since Microsoft is no longer maintaining them, they may or may not work. Here are the details:
Send an e-mail – This option will trigger your system to send an e-mail with a customized message on a chosen schedule. However, it will only work if you specify an e-mail server
Display a message – When you choose this option, you will see a text message on your screen by the time the task starts on a schedule
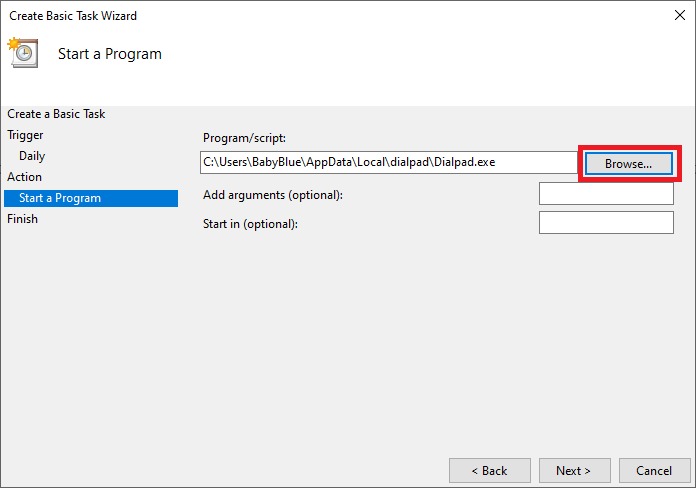
15. Specify the path for the application in the Program/script field. If you are not aware of the app’s path, you can select Browse to locate it
Optional: If you want to run the task with special instructions, you can type the conditions in the Add arguments field. You can leave the Start in field empty, but you can specify the folder in which the program will start in this field.
16. Click the Finish button
Completing all of the above creates and activates a scheduled task, allowing it to run automatically
Conclusion
The Task Scheduler built into Microsoft Windows is a powerful tool with many more features than just launching applications, so we will cover advanced tasks in a later update.
For now, hopefully this was an informational guide with a quick and dirty introduction to a very powerful tool. I use the Task Scheduler to regularly force myself to complete daily duties and find it incredibly easy to configure. Please play around with the tool and see what kind of useful tasks you can automate!
Need help with your Puget Systems PC?
If something is wrong with your Puget Systems PC. We are readily accessible, and our support team comes from a wide range of technological backgrounds to better assist you!
Looking for more support guides?
If you are looking for a solution to a problem you are having with your PC, we also have a number of other support guides that may be able to assist you with other issues.
